Where were we?
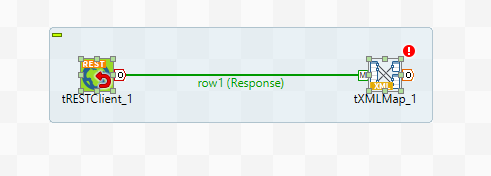
Following on from the previous article in this series (Datalytyx Tube Series #2), we had just configured the tRestClient component to return a 1 row response containing the statuses for several tube lines buried in XML. This is demonstrated in the screenshot below. The next job is to extract this information from the XML so that Talend views each tube line as a row of data in itself.
Below is an excerpt from the XML response.
<LineStatus ID="0" StatusDetails="">
    <BranchDisruptions/>
    <Line ID="1" Name="Bakerloo"/>
    <Status CssClass="GoodService" Description="Good Service" ID="GS" IsActive="true">
      <StatusType Description="Line" ID="1"/>
    </Status>
  </LineStatus>
Hopefully you should be able to see that this section of XML tells us that the Bakerloo line has a line ID of 1 and a Status with the description of “Good Service.” Now we want to transform this from the XML into something resembling:
|
ID |
Line |
Status |
|
1 |
Bakerloo |
Good Service |
Step in… The tXMLMap Component
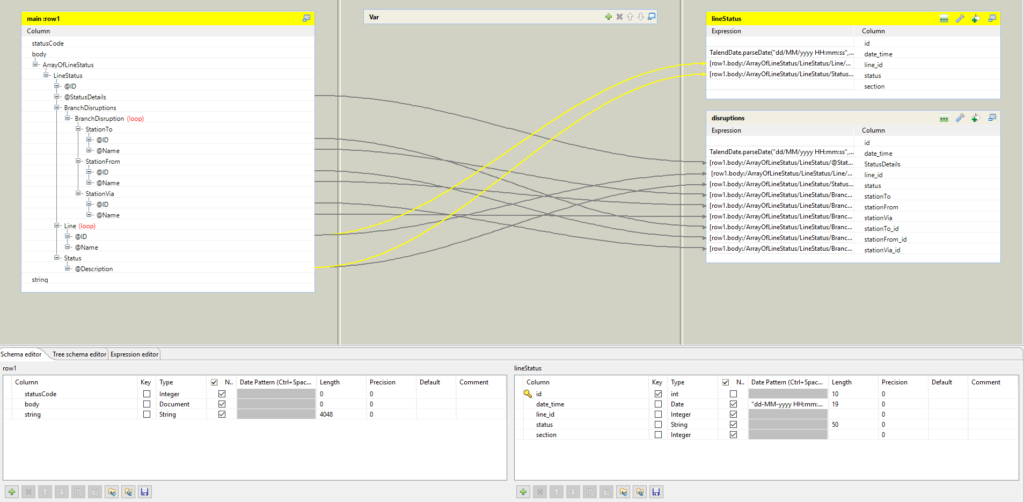
In this section I will take you through, step-by-step, the process of saving an XML file as metadata to the Talend repository. We will then use this metadata in the tXMLMap component to extract the fields we want to pass through to the next stage of the Talend job. Below is a screenshot of the finished article:
How to Configure a tXMLMap
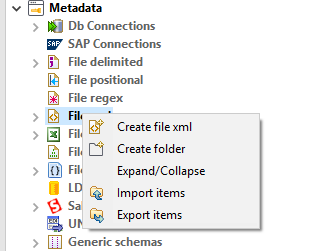
1. The first step is to make sure you have the XML structure defined in metadata section of the repository. Right click “File xml” under Metadata and select “create file xml.”
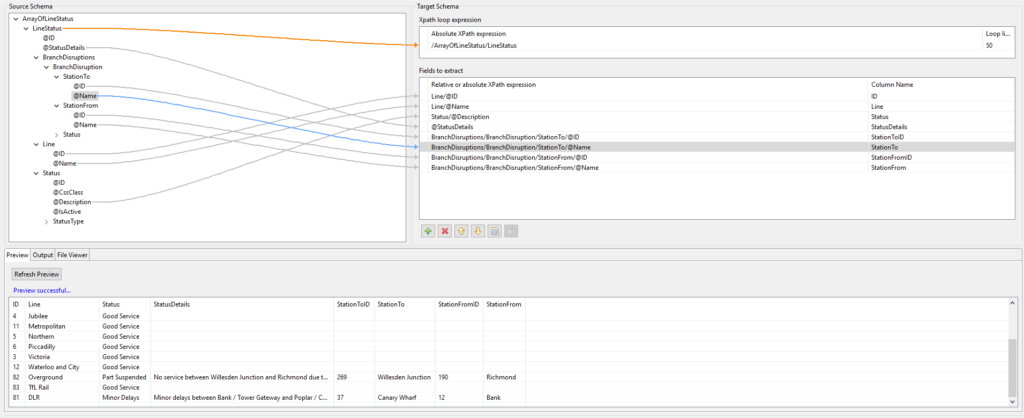
2. After selecting the XML file (I pasted the response from my browser into a text editor and saved as an xml file), click through the wizard until you get to the below screen.
In this screen you will be able to select the element that you want to loop through in your XML and which fields you want to extract. This can all be done by simply dragging and dropping from the left hand box (which defines the source schema) to the two boxes on the right. After you have done this you can edit the column names if you wish and preview the final output by clicking the “Refresh Preview” button.
3. If you haven’t done so already then now is time to bring a tXMLMap component on to the design canvas next to your tRestClient component. Then bring the response from the tRest over to the tXMLMap.
4. Click into the tXMLMap component and right click on “body” in the input window, and then “Import from Repository.” As you can see from the screenshot below, you could just import straight from the file, but it is best practice to use the repository in most cases.
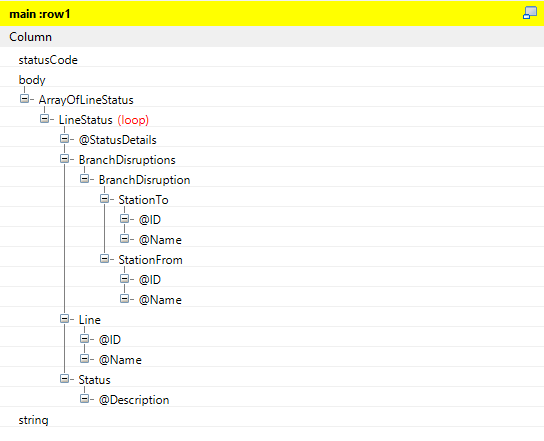
You should now see something like this:
5. Usually at this stage you would be ready to start pulling fields over to the output table side of the tXMLMap. However, I want to show you that there is a little more functionality on the XML schema definition side.
The particular XML response that I saved does not include all the elements that are available. When there is a disruption on a line that has more than one branch then the response will contain, under the “BranchDisruptions” sub-element, a stationTo, StationFrom and a StationVia (which is currently missing) sub element. In the screenshot above, you can see there was no StationVia. Let’s look at how we can edit this structure to include the “StationVia” sub-element.
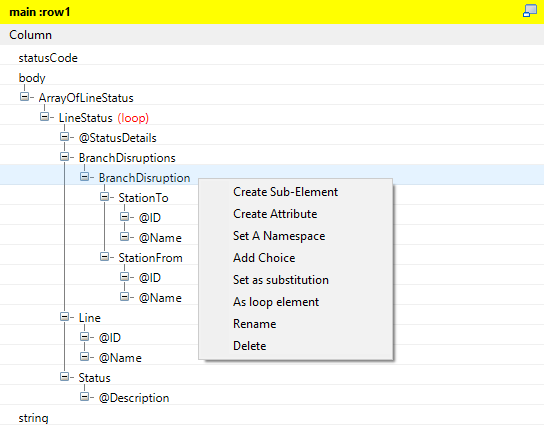
Right click on branch disruption sub-element and select “Create Sub-Element and call this sub-element “StationVia.”
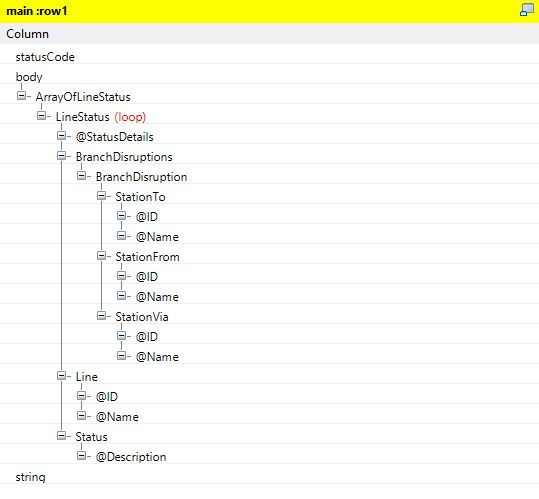
Right click on the new “StationVia” sub-element and create attributes called “ID” and “Name”. You should then have something resembling the below image:
6. Now let’s drag some fields across and link this tXMLMap up to a tLogRow to see what we have.
At this stage I believe we have achieved our objective of transforming a 1 row XML response into multiple rows. Each of which rows represent the status of each line. In my final solution I have split the above output in two, one output representing just the line and its status at that given time and the second output representing any line disruptions in more detail. This process involves defining multiple looping elements in the tXMLMap and is going to be the subject of a future blog.
I hope you have found this useful, please feel free to leave comment below or get in contact with is directly! Alternatively, you can subscribe to the Datalytyx blog so that you’ll receive a monthly update of all our latest articles.





0 Comments